Upgrading your Windows 11 Home edition to Windows 11 Pro is a smart decision, offering advanced features for enhanced security, professional networking, and productivity. This comprehensive guide provides detailed steps, ensuring a smooth transition and maximizing your PC experience.
Why Upgrade to Windows 11 Pro?
Before diving into the upgrade process, let’s explore the key advantages of Windows 11 Pro:
1. Advanced Security Features:
Windows 11 Pro introduces robust security measures, including BitLocker encryption and Windows Defender Antivirus, safeguarding your system against potential threats.
2. Professional Networking Capabilities:
For users in professional settings, Windows 11 Pro allows domain joining, ensuring seamless integration into corporate networks.
3. Powerful Management Tools:
Windows 11 Pro provides access to potent management tools like Group Policy, allowing users greater control over system configurations.
4. Virtualization for Productivity:
With the inclusion of Hyper-V, a virtualization platform, users can run multiple operating systems on a single machine, boosting productivity.
5. Dynamic Remote Desktop:
Windows 11 Pro empowers users with dynamic remote desktop capabilities, enabling secure access to your PC from any location.
Step-by-Step Guide to Windows 11 Pro Upgrade:
Step 1: Check System Requirements
Ensure your PC meets the system requirements for Windows 11 Pro, including sufficient storage, compatible hardware, and a stable internet connection.
Step 2: Backup Your Data
Although the upgrade process aims to preserve files, it’s wise to create a backup using an external drive or cloud storage.
Step 3: Acquire Windows 11 Pro License
Purchase a valid Windows 11 Pro license from the Microsoft Store or authorized retailers and have the license key ready.
Step 4: Open Settings
Navigate to “Settings” on your Windows 11 Home PC by clicking the Start button and selecting the gear-shaped icon.
Step 5: Select “System” and then “About”
Within Settings, choose “System” and click “About.”

Locate the “Product key and activation or Change product key or upgrade your edition of Windows” option.

Step 6: Enter the Product Key
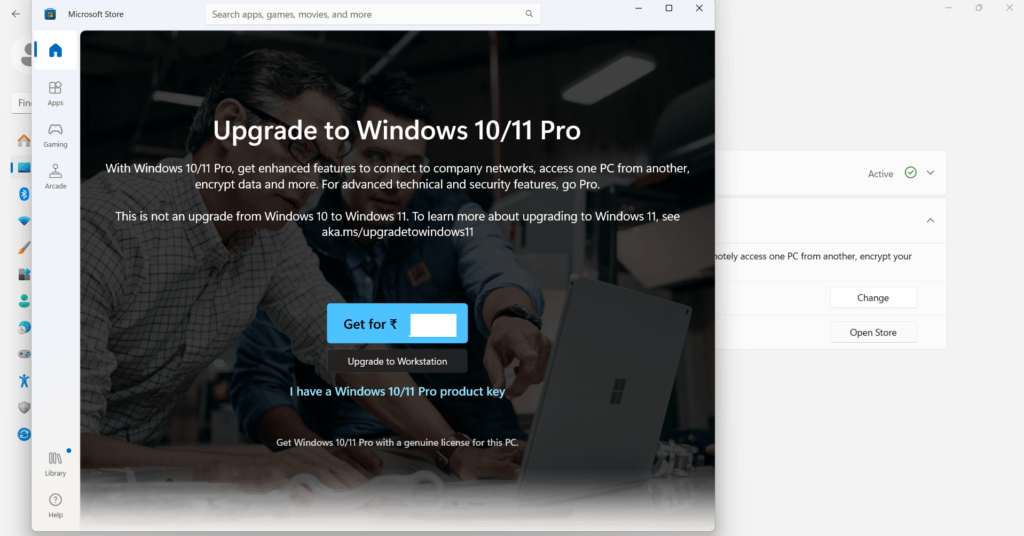
Click on ‘Change’ button to change product key as shown below. Input the Windows 11 Pro product key and follow on-screen prompts to complete the activation process.

In case you don’t have Windows 11 Pro product key, you can click on Open Store button as shown above to upgrade in the Microsoft app. This will open windows store to purchase the key as shown below.

Step 7: Download and Install Windows 11 Pro
Once activated, Windows will prompt you to download and install the necessary files for the Pro edition. The duration depends on your internet speed.
Step 8: Follow On-Screen Instructions
During installation, follow on-screen instructions to customize settings, including privacy preferences and user account details.
Step 9: Restart Your PC
After installation, your PC will prompt a restart. Save any ongoing work before proceeding with the restart.
Step 10: Verify Windows 11 Pro
Post-restart, confirm the upgrade by navigating to “Settings” > “System” > “About” to ensure your Windows edition is now Windows 11 Pro.
Conclusion: Elevate Your PC Experience with Windows 11 Pro
Upgrading from Windows 11 Home to Windows 11 Pro offers a host of benefits. This step-by-step guide ensures a seamless transition, allowing you to unlock advanced features and make the most of your computing journey. Don’t settle for basic functionalities – follow these comprehensive steps to elevate your Windows 11 experience today!

