Introduction
Activating your Windows 11 operating system isn’t just a formality; it’s a key step in unlocking a host of features and benefits that enhance your overall computing experience. This in-depth guide is designed to take you through the process of verifying and troubleshooting activation on Windows 11. We’ll cover three methods, each explained in detail to make the process seamless and easy to understand.
Why Windows 11 Activation Matters:
Before we dive into the methods, let’s understand why activating your Windows 11 is crucial:
1. Access to All Features:
An activated Windows 11 provides access to all its features, ensuring you get the most out of your operating system.
2. Timely Updates:
Only activated systems receive timely updates, including essential security patches and performance improvements to keep your system running smoothly.
3. Personalization Galore:
Activation allows you to personalize your Windows 11 experience, from changing wallpapers to tweaking themes, colors, and other visual elements.
4. Priority Microsoft Support:
Activated systems receive priority support from Microsoft, offering assistance and guidance whenever you need it.
Method 1: Verifying Activation through Settings
Step 1: Navigate to Settings
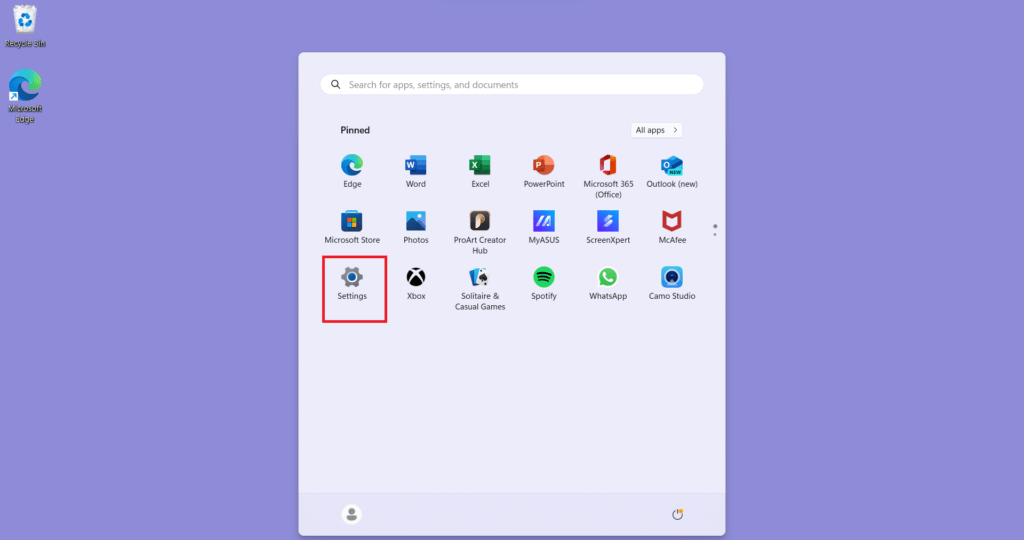
Start by clicking on the Start button or using the Windows key, then select Settings from the Start menu.

Step 2: Access System Settings
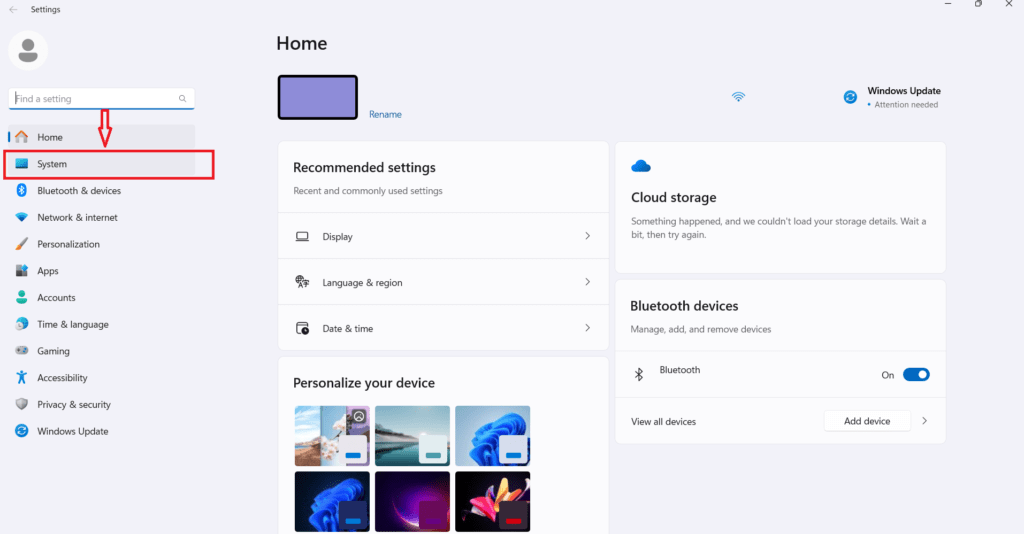
Within the Settings window, go to the System category.

Step 3: Explore the ‘About’ Section
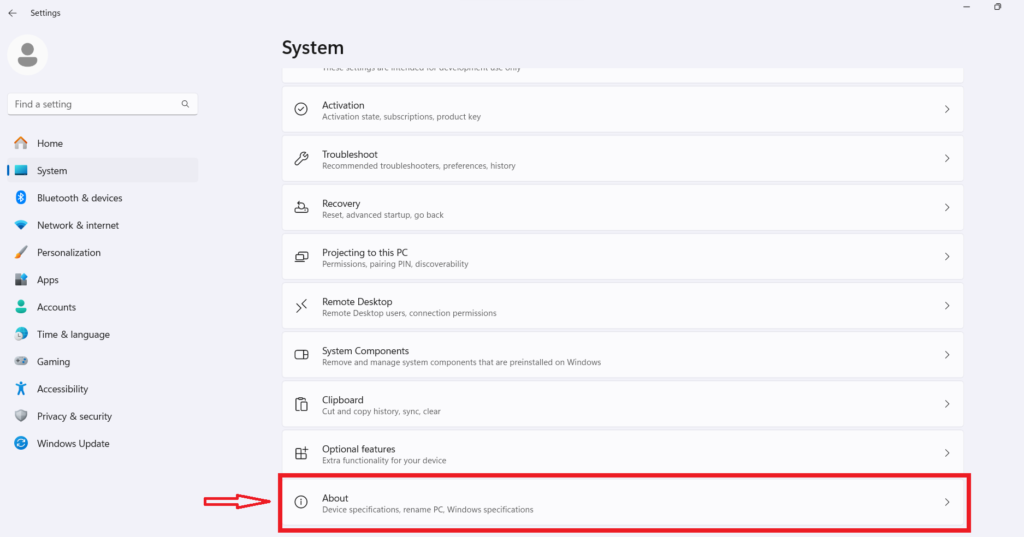
Select About from the left-hand side options in the System menu.

Step 4: Check Windows Specifications
Scroll down to the Windows specifications section and examine the activation status line. Alternatively, you can click on the activation option shown below as well.

If the Activation state reads Active, it means that windows is fully activated.

Step 5: Troubleshoot Activation Issues
If Windows 11 is not activated, click on Troubleshoot under the activation status and follow the provided sub-steps to resolve any issues.
Method 2: Verification via Command Prompt
Step 1: Open Command Prompt
Press Windows key + X and choose Command Prompt (Admin) from the menu.
Step 2: Run Activation Command
Type slmgr /xpr and press Enter to see the activation status.
Method 3: Checking Activation through Run
Step 1: Open Run Dialog
Press Windows key + R to open the Run dialog.
Step 2: Enter Activation Command
Type slui 3 and press Enter to open the activation window and check the current activation status.
Conclusion:
Activating Windows 11 is more than just a task; it’s about unlocking the full potential of your operating system. This guide, broken down into three user-friendly methods, ensures that verifying and troubleshooting activation issues becomes a straightforward and stress-free process. Activate with confidence and enjoy the enriched experience of a genuine and fully activated Windows 11 operating system.

